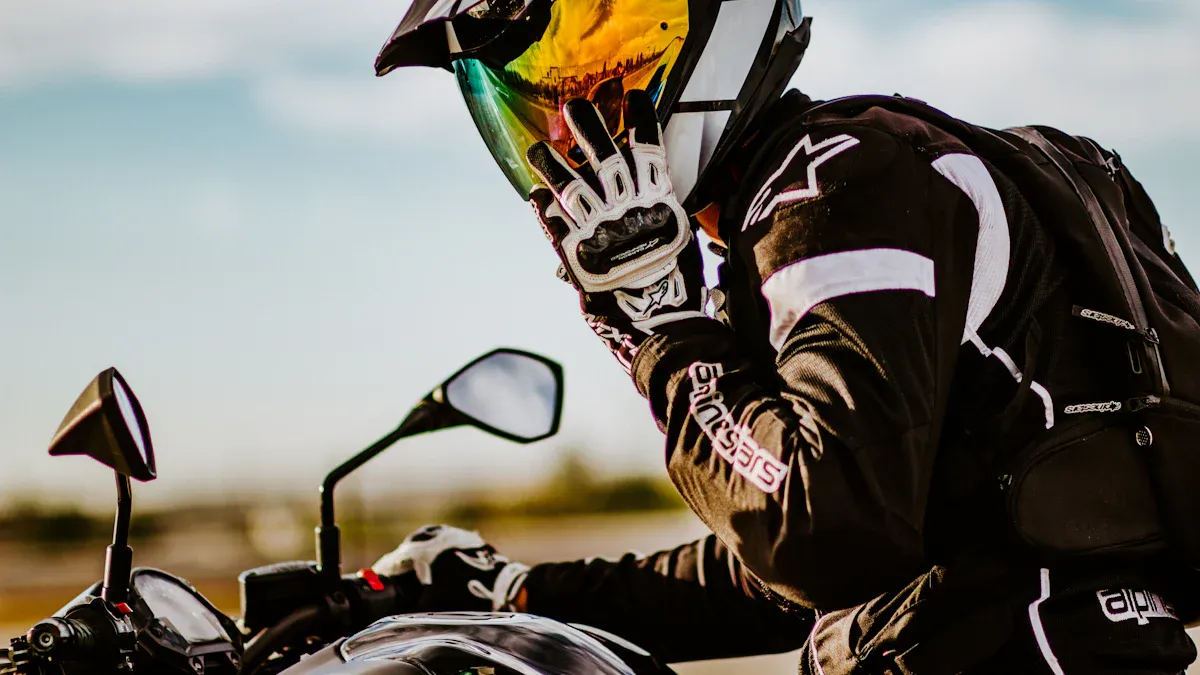
Ready to take your rides to the next level? With a motorcycle smart riding system, you can boost your safety and stay connected on every journey. You do not need to be a tech expert to get started. This guide will help you unlock the power of your motorcycle smart riding system and show you how to enhance your riding experience. Safety and confidence go hand in hand when you know how to use your gear.
Key Takeaways
- Collect all tools and parts before you start. This helps you not waste time during setup.
- Make sure your workspace is clean and bright. Follow the system manual one step at a time for easy setup.
- Put the display and cameras in a safe spot. Make sure you can see them well. Do not block any controls or your view of the road.
- Connect the wires slowly and use the right tools. Check every connection before you turn on the system.
- Try out all features like Bluetooth, cameras, and GPS before you ride. Keep checking the system often to make sure it works well.
Preparation
Tools Needed
Before you start, gather everything you need. Most motorcycle smart riding systems come with a set of installation tools right in the box. You will also find cameras, a GPS module, a mounting bracket, a power cable, and a manual included. If you want to make things even easier, keep a few extra tools handy:
- Phillips and flathead screwdrivers
- Small adjustable wrench
- Zip ties for cable management
- Electrical tape
- A pair of safety gloves
Tip: Always double-check the package contents before you begin. This helps you avoid searching for missing parts halfway through the job.
Workspace Setup
A good workspace makes the installation smoother and safer. You do not need a fancy garage, but you should set up your area with care. Here are some simple steps to follow:
- Clear your workspace and keep it tidy. This helps you avoid losing small screws or parts.
- Use trays or small containers to organize all the components.
- Wear safety gloves to protect your hands from grease or sharp edges.
- Sit on a comfortable chair with good support. You might spend a while working.
- Make sure you have bright overhead lighting. You want to see every detail.
- If you use a soldering iron, set up a fan or open a window for fresh air.
- Keep measuring tools like a multimeter close by to check electrical connections.
Staying organized and comfortable helps you focus and finish the job right.
System Manual
The system manual is your best friend during setup. It guides you step by step, so you do not miss anything important. Most manuals follow a clear order:
- Start with mounting the display and cameras. Pick spots that keep your handlebars neat and your view clear.
- Move on to wiring. Connect the power cables to the right spots and hide the wires for a clean look.
- Pair any remote controls or extra devices. Some systems let you plug into your bike’s harness for easy setup.
- Finish by setting up the software. Adjust your display, calibrate features like blind spot detection, and check for updates.
Take your time with each step. The manual helps you get everything working smoothly from the start.
Motorcycle Smart Riding System Features
Hardware Overview
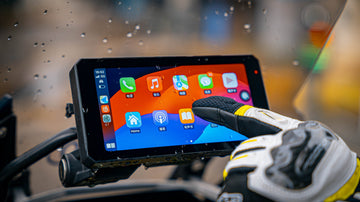
A motorcycle smart riding system has many cool parts. It usually has a bright 5-inch IPS touchscreen. You can see the screen well, even in sunlight. You can tap it to control the system. There are two cameras that record the front and back in high definition. This helps you keep a record of your ride. The tire pressure monitor checks your tires all the time. It warns you if your tires need air. The system uses Bluetooth to connect to your phone and helmet. You can make calls and play music without using your hands.
The GPS helps you find your way easily. The system is waterproof, so you can ride in the rain. Memory and sensors help the system work fast and smooth. Some systems have electronic clutch control. This makes changing gears easier and safer.
Here’s a quick look at some key features:
| Feature | What It Does |
|---|---|
| Dual Cameras | Records front and rear views in HD for safety and evidence |
| Tire Pressure Monitor | Gives real-time alerts to keep your tires healthy |
| 5-inch Touchscreen | Lets you control settings and navigation easily |
| Waterproof Design | Works in rain and tough weather |
| Bluetooth Connectivity | Connects to your phone and helmet for calls and music |
| GPS | Provides accurate directions and location tracking |
These features help you feel safe and enjoy your ride more.
Software Functions
The software brings all the parts together. With carplay, you can see your phone’s screen on the display. You can use your favorite map apps and listen to music. You can send messages without touching your phone. Carplay gives you traffic updates and new routes. This helps you avoid traffic and stay safe.
The system records your ride with emergency video. If something happens, it saves the video for you. Video encryption keeps your videos private. You can switch between camera views with one tap. The app lets you preview, download, and update your system from your phone. Carplay also lets you make calls and listen to podcasts. You can do all this while keeping your eyes on the road.
The software makes riding safer, more fun, and easier for you.
Installation Guide
Setting up your motorcycle smart riding system can feel like a big job, but you can do it with some patience and the right tools. This installation guide gives you easy-to-navigate instructions so you can get started quickly and safely.
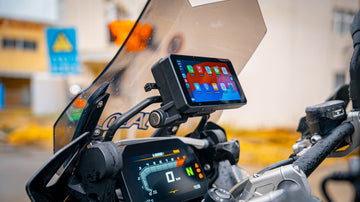
Mounting Display
You want your display to be easy to see but never in the way. Follow these simple steps for a secure mounting solution:
- Park your motorcycle on a flat surface. Turn off the engine and remove the key.
- Find a spot on your handlebars where you can see the display without blocking your view of the road.
- Attach the mounting bracket to the back of the display using the screws and hex wrench from your kit.
- Place the bracket on the handlebars or dashboard. Adjust the angle so you can see the screen clearly.
- Tighten all screws firmly. Make sure the display does not move when you touch it.
- If your system comes with a wireless remote, mount it close to your hand using the L-shaped bracket. This keeps controls within easy reach.
- Double-check that the display does not block any switches or gauges.
Tip: Always check that the display and remote are stable before you ride. A loose display can distract you or even fall off during your trip.
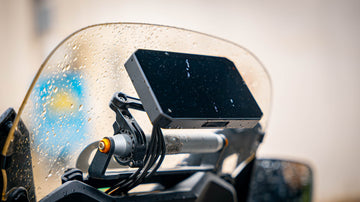
Wiring and Power
Wiring might sound tricky, but you can handle it if you take your time. Here’s how to connect everything safely:
- Identify the wires: Black is for the negative pole, red goes to the accessory power (ACC), and yellow connects to the positive pole of your battery.
- Use a multimeter or your motorcycle’s manual to find the ACC fuse slot. This helps you connect to the right power source.
- Trim and prepare the wire ends. Use connectors like Posi-Locks or Posi-Taps for a secure fit.
- Route the cables along the frame. Use zip ties to keep them away from hot or moving parts. Protect wires with tubing if they pass near sharp edges.
- Avoid making too many joins. If you must join wires, solder them and cover with heat shrink tubing.
- Choose the correct wire size and fuse rating. This prevents blown fuses and keeps your system safe.
- Before turning on the power, check all connections. Make sure nothing is loose or exposed.
- Turn on the ignition. The display should light up. If not, recheck your power and ground connections.
- Organize any extra cable length so it does not dangle or get caught.
Safety Check: Always use a switched 12V DC supply. This stops the system from draining your battery when the bike is off. Keep your workspace clear and use gloves to protect your hands.
Device Pairing
Pairing your devices brings your smart riding system to life. You can connect your smartphone, Bluetooth headset, or even a wireless remote. Here’s how to get started:
- Turn on Bluetooth on your smart riding system and your device.
- On the display, open the Bluetooth menu. Select “Pair New Device.”
- Choose your smartphone or headset from the list. Confirm the pairing code if asked.
- For headsets, make sure the control box is attached to your helmet and the speakers and mic are in place.
- Some headsets let you use voice commands like Siri or Google Assistant. This keeps your hands on the handlebars.
- Test the connection by playing music or making a call. Adjust the volume so you can hear clearly but still pay attention to the road.
- If you have a wireless remote, follow the on-screen instructions to pair it with the display.
Note: Always check that your devices are compatible with your system. If you get stuck, watch the manufacturer’s video tutorials for extra help.
With these steps, you can install your smart riding system with confidence. Take your time, follow each step, and enjoy the new features on your next ride!
Testing and Setup
Initial Power-On
Now that you have installed your smart riding system, it’s time to turn it on for the first time. Make sure your motorcycle is parked safely. Insert the key and switch on the ignition. Watch for the display to light up. If nothing happens, check the power cables. The yellow wire should connect to the ACC, and the red wire should go to the battery’s positive pole. A stable power connection keeps your system running without interruptions.
Tip: If the screen stays dark, double-check all wiring and make sure the battery is charged.
Feature Check
You want to make sure every feature works before you hit the road. Here’s a simple checklist to follow:
- Turn on Bluetooth and Wi-Fi on your phone. Pair your phone with the system. Keep your phone close—within two meters—for a strong connection.
- Check if your phone’s software is up-to-date. iOS 13 or Android 11 and above work best.
- Try hands-free calls using Siri or Google Assistant. Speak a command and see if the system responds.
- Test the cameras. Look at the live video feed on the display. Make sure both front and rear cameras show clear images.
- Record a short video. Play it back to check for sound and picture quality. If you can’t hear anything, make sure the microphone is not blocked and the app has mic access.
- Open your favorite map app through CarPlay or Android Auto. Watch for real-time speed and trip mileage on the screen.
- Pair your Bluetooth headset or helmet. Play music or make a call to test the audio.
Note: Delete any old Wi-Fi profiles on your phone that might cause connection problems.
Troubleshooting
Sometimes things don’t work right away. Don’t worry—most issues are easy to fix.
- If Bluetooth won’t connect, restart your phone and the system. Try pairing again.
- No camera image? Check the camera cables and adjust the angles.
- If GPS isn’t tracking, make sure the module is plugged in and the system has a clear view of the sky.
- For sound problems, check the microphone hole and app settings.
- If the display flickers or turns off, check the power cables for loose connections.
Stay patient and work through each step. Testing now saves you trouble later and helps you ride with confidence.
Safety Tips
Pre-Ride Checks
Before you start your ride, you should always check your motorcycle and smart riding system. These steps help you stay safe and spot problems early:
- Check your tires and wheels. Look for cracks, low pressure, or anything stuck in the tread.
- Test the brakes. Make sure they work and the pads are not worn out.
- Inspect the controls. Move the handlebars, levers, and throttle to see if they feel right.
- Turn on all lights. Check your headlight, brake light, and turn signals.
- Look at the oil and fuel levels. Make sure there are no leaks.
- Check the chain or belt. It should not be too loose or too tight.
- Make sure the stands fold up and down smoothly.
Tip: Always check your smart riding system display for any warning lights or alerts before you ride.
Safe Operation
When you use your smart riding system, keep your focus on the road. Use navigation and media features only when it is safe. Set your route and music before you start moving. If you need to change something, pull over first. Keep your hands on the handlebars and your eyes up.
You should also know the laws about recording video and audio while riding. Here is a quick guide:
| Legal Rule | What You Need to Know |
|---|---|
| Camera Placement | Do not block your view with the display or cameras. |
| Audio Recording | Some states need everyone’s consent to record audio. |
| Private Property | Always ask before recording on private land. |
| Screen Distraction | Some states want screens off while riding. |
Stay aware of privacy rules and always let your passengers know if you are recording.
Maintenance
Taking care of your motorcycle and smart riding system keeps everything working well. Here are some easy ways to keep your gear in top shape:
- Clean your display and cameras often. Dirt can block your view.
- Check for software updates every few months. Updates fix bugs and add new features.
- Watch for warning lights on your dashboard. Fix problems early.
- Keep your battery charged and cables tight.
- Inspect and clean your chain, brakes, and tires.
Good maintenance is one of the best safety tips you can follow. It helps your smart riding system last longer and keeps you safe on every ride.
When you use a motorcycle smart riding system, you get more than just cool tech. You boost your safety with crash detection and impact alerts. You see better with rearview cameras and bright LED lights. You talk hands-free, follow GPS, and even chat with other riders.
- Stay connected with real-time communication
- Get help fast with automatic crash alerts
- Record your rides for peace of mind
One rider shared how the system’s crash alert brought help right away after an accident. Keep your system updated and check it often. These steps help you enhance your riding experience and ride with confidence every time.
FAQ
How do you update the smart riding system software?
You can update your system by downloading the latest software to a TF card. Insert the card into your device. Follow the on-screen instructions. Updates help your system run better and add new features.
Can you use the system in heavy rain?
Yes, you can. The system has a waterproof rating of IP67. This means it works well in rain and wet conditions. You do not need to worry about water damage.
What should you do if the display does not turn on?
First, check the power cables. Make sure all connections are tight. Try turning the ignition off and on again. If the screen stays dark, look at your manual or contact support.
Is it safe to use navigation while riding?
Yes, but set your route before you start moving. Glance at the screen only when it is safe. Keep your eyes on the road. If you need to change directions, pull over first.